Friday, October 31, 2014

Halloween Fudge

This recipe contribution is by my dear friend Kristi.  We became friends in 5th grade and have been the best of friends ever since. We have the same tastes in movies, books, and music and we also share a love of traveling and cooking.  In fact, we traveled to Italy together, along with family and friends, a few years ago.  It was a great time and an adventurous way to celebrate turning the big 4-0! Kristi is a media specialist and the one who inspired me to become a teacher!  We love to talk about educational issues and share new teaching ideas.  Along with sharing teaching tips, we love to share recipes.  I always get the best ideas from her.  This Halloween Fudge recipe incorporates two of my favorite things-peanuts and candy corn.  Combine these two ingredients and it tastes like a Payday candy bar.  It's addictive!  Kristi is such a clever cook.  I love how she combined these two salty and sweet ingredients into a fudge recipe.  I hope you enjoy this yummy Halloween Fudge. - Karen

Halloween Fudge

Melt 12 ounces white chocolate chips, 1/2 cup creamy peanut butter, and one can (14 ounces) sweetened condensed milk on low heat.  Remove from heat and add 1 teaspoon of vanilla, one cup peanuts, and one cup of candy corn. Quickly spread into a line 8 x 8 or 9 x 9 pan.  Press additional 1/2 cup of peanuts and candy corn on top.  Refrigerate to set and then cut into squares.

This is definitely NO trick, just a delicious treat!   Enjoy this sweet treat and have a safe and happy Halloween!  - Karen 

Saturday, October 25, 2014

Parent-Teacher Conference Tips

For new teachers, parent-teacher conferences can be intimidating.  Rightly so. You have these parents that you barely know looking at you and waiting on you to tell them all about their kid.  I remember when I had my first parent-teacher conference 18 years ago.  I was so nervous.  What do I do?  What do I say?  Ugh.  So much to think about.

After 18 years, I still get a few butterflies, but it's much easier.  I just finished up a round of conferences for this fall.  After reflecting on the conferences that I've done throughout the years, I decided to write a few tips for new teachers.

First, I think it is always best to speak from the heart. Tell parents what you know about their kid- what are the student's likes and dislikes about school, what books does the student love to read, who are the student's friends, how does the student act in social and cooperative group situations, and what are the student's work habits like.  Parents will feel great knowing that you really KNOW their child.

I always try to tell a funny story to parents about their child- nothing embarrassing, but something cute that I know a parent would appreciate. Laugh with them. They may even have a funny story to share with you. Laughter always puts everyone at ease.

For many parents, they may be intimated by YOU.  So, give them the information they need, but take the time to create a relationship with your student's parents.  After all, you are partners in their child's education.


Two Stars and A Wish- see related section for details.
Here are some tips for making your parent- teacher conferences run smoothly and some different ideas you can try if you'd like.

Scheduling
1.  At Meet the Teacher, put out a sign-up sheet.  This will give you a good start on who would like what day and time.  You can follow up closer to parent-teacher conference time to see if the date and time still work.
2.  Make phone calls the week before.  This strategy has always worked well for me. It takes just a few minutes.  I try to keep it casual and conversational, "This is Mrs. Smith, Billy's fifth grade teacher at So and So School.  I'm setting up parent-teacher conferences and wanted to know which day would work better for you?  Tuesday, October 21 or Thursday, October 23? Would you like 4:30 or 6:00?  I always give them two choices to start with because it helps narrow down when they can come.  
3.  Send home a reminder note the week of conferences AND the day of the conference. Have students write down their time in their daily agenda.  Some teacher friends who teach in the younger grades pin a reminder to their student's shirts.  Do whatever works-just get them there!
4.  Send an email with your parent-teacher schedule to your distribution list.   I usually send an email to parents, school office staff, and specialty teachers with my parent-teacher schedule.  This way, the office will know what time parents are scheduled in case they have any phone calls from parents and specialty teachers can join you in the conference if we share students.

Organization
You can have teacher-led or student-led conferences.  I've found that it is always easier to do a teacher-led conference in the fall and if you choose to do a student-led conference, it's easier in the spring.  Student-led conferences do require more prep work, so keep that in mind if you choose to do this. Most conferences range from 15 to 30 minutes, depending on how many students you have and the time you have allotted for conferences.  I always invite students to attend conferences with their parents.  After all, we are talking about their progress and they should be a part of the process.  If you need to discuss private information, you can have the student step out of the room if needed.  Some teachers do not like to have students in the room, but I just don't understand why.  After all, in order for a child to be successful, the child, the teacher, and the parent need to ALL be invested in this learning process. Like I said, before, there may be times when you might ask the child to leave the room, but for the most part, why wouldn't you want a child to hear your praise and recommendations for success?  I want my students to know that WE (parents and teachers) are working together for THEIR success.

Student-Led Conferences
These conferences are self-reflective in nature and led by students.  The conference is really centered around the student and parent discussing the child's progress.  Now, don't get me wrong.  The teacher is still there and supporting the student if needed and interjecting if necessary.  Students present their portfolio and work samples to their parents.  Before the conference, students write about their progress in each subject area and answer the following questions:  What have I learned?  What activity or lesson did I enjoy the most?  What am I most proud of?  What do I need to work on to improve?  You can use surveys or self-assessments with rubrics. Self-assessments are a great tool and allow students to reflect on their personal progress. In the past when I given self-assessments to students, the results were always interesting and oftentimes students would score themselves more critically than I would.  Before the student's scheduled conference, I would always take time to go over their self-assessment with them to see if our assessments would be the same and discuss areas where they scored themselves low.  You can find many of these types of assessments online, or you can absolutely create your own to fit your grade level or subject area.  Below are some examples of student-led conference evaluations and questioning ideas for parents.


Conference Notes
During your conference you'll probably want some kind of notes to refer to.  I use a reference sheet with information about the student's strengths, challenges, work habits, assessment information, etc...  Some teachers like to wing it, and that's fine.  For me, I'm always afraid I'll forget something important.  Do whatever works for you!  The conference notes page is great to have as a record of what I talked about with the parents during the conference and I can take notes if there is something that I need to follow-up on at a later date.  You can tuck it away in your student file and refer to it for the next conference.  Below are some examples of how you can organize your parent-teacher conference notes. Again, do what works best for you.  I'm sure you can find other examples online as well.


Student Portfolios / Work Samples
Conferences are a great time to show parents examples of their student's work.  You may keep examples of their work in a student portfolio or file folder.  Sometimes items in the portfolio could be teacher selected to show growth or concerns, or they can be student-selected.  Here's a cheap and easy way to make a portfolio-take two pocket folders (no metal brats), cut the folders in two, put the folders together again, then bind them with a binding comb.  You can have students create a cover page and they can put items from different subject areas in each pocket.  

Language Barriers
You may have parents that don't speak English.  Some districts will provide interpreters, or ask high school students to translate.  You may even have to ask your student to translate the information to their own parents.  If you know that a parent doesn't speak English and your student has an older sibling, you could invite the older sibling to translate.  Don't let a language barrier keep you from establishing a relationship with a parent.

During the Conference
  1. Dress professionally.  
  2. Be prepared and ON TIME!  If you are going over time during a conference, acknowledge the parent that is waiting and say "I'll be with you in just a minute", or politely offer to set up another meeting time with the parent who needs more time to discuss his or her child.  You are not being rude, but rather considerate of parent's appointment times.  
  3. Have chairs outside your classroom door, so parents can sit and wait comfortably.  Have a photo album or student work on display so they'll have something to look at.
  4. When parents enter your classroom, greet them with a smile and shake their hands.  A firm handshake, not a wimpy, fish shake.  I hate those.
  5. Have a comfortable seating area and table set up in your classroom. Have quiet toys, books, crayons and paper available for siblings that come with parents. 
  6. During the conference you may have to discuss areas of improvement, but always end the conference with a positive comment about the student.  
  7. If you have something to follow-up on, do it in a timely manner and get back to the parents so they know you did it.
After the  Conference
A great way to follow up conferences is with something called "Two Stars and a Wish".  You can ask parents to respond to their child's conference with a positive letter.  In the letter, the "two stars" refer to two things parents were especially pleased with during the conference.  The "wish" refers to one thing parents would like to see their child work on in the future.  Parents will send their letter to school in a sealed envelope.  Sometimes parents even decorate their special letters.  You could have colored writing paper and envelopes available at conferences, plus a mail box for parents to drop them in.   Plan to have students open the letters once you have received them all. Oh, and double check and triple check to make sure you have them ALL.  You don't want to see a dissapointed child's face when you start passing the letters out and you've forgotten ONE letter.   Disaster!  You could declare a special "Two Stars and a Wish" day.  Tell your students that their letter is special and private and for no one's eyes but their own.  Send students off to read their letter privately.  After opening their letter, they can keep them in their binder for future encouragement and to inspire them to reach their goals for the rest of the year.  Below are some examples of letters that I sent home to parents detailing what to do for the "Two Stars and a Wish".  


I hope you enjoy getting to know your student and their parents this year and building positive relationships. If you have any parent-teacher conference tips, please leave them in the comments section.  Thanks!

-Karen

Wednesday, October 22, 2014

Chocolate Peanut Butter Pies

This blog post is written by my friend Mary, whom I've known for, well, many years.  We were sorority sisters at Oklahoma State University and roommates after college.  She currently lives in Delaware and manages the Creative Department at a local TV station.  She also teaches two classes at a local community college. Mary and I love to swap recipes and when she visits, we always make time to whip up a delicious recipe or two.  I hope you enjoy her post and her Chocolate Peanut Butter Pies. -Karen

I love to cook, and I also like appetizers or desserts that look fancy but are easy to make.  On the downside, I do not like to grocery shop or clean.  So when my friend Karen asked me to write a guest blog, I was honored but also a little nervous.  What could I make that would require minimal time in the store and nearly no dish washing?
That's when I came up with these mini-chocolate peanut butter pastries. Really, who doesn't love chocolate AND peanut butter?  The recipe only has two ingredients, and the clean up involves tossing the parchment paper in the trash and licking a spoon (okay-you can wash it after you lick it).  And a bonus-each serving is only approximately 176 calories.


What you need to buy- Pepperidge Farm Puff Pastry Sheets and Jif whips- Whipped Peanut Butter and Chocolate.  I highly recommend this whipped combo.  Not only is it tasty, but it has fewer calories than regular peanut butter.  Two tablespoons-150 vs. 200 calories.  (But each serving will only have one TBSP- see below).  You can substitute ready-made pie crust for the puff pastry, but it's not as decadent.


Start by thawing the sheets of the puff pastry (about 30-40 minutes). Preheat oven to 400 degrees.  Using a pizza slicer, cut each pastry sheet into nine squares.

Add no more than one tablespoon of the whipped peanut butter and chocolate in the center of each pastry square.


Fold over each pastry and press to close.  You may want to add a little water on the edges before pressing in order to get a better seal.


Using a fork, give the edges a final seal and place on baking sheet lined with parchment paper.  Bake for 10-15 minutes until pastries are puffy and lightly browned.

After removing from oven, filling will be very hot, so let them cool (if you can wait).

Store in an airtight container.  Honestly, I can't tell you how long they will keep because they usually disappear immediately at parties.


Here's the ooops picture!  
One box of pastries will make 18 pies.  Or if you want more bite size pies, just cut smaller squares and use less filling.  The goal is to not overfill so you get a good seal around the edges or else this is what happens.  Not so pretty but still yummy. Enjoy!

Chocolate Peanut Butter Pies
1 box Pepperidge Farm Puff Pastry Sheets
Jif Whips- Whipped Peanut Butter and Chocolate

Thaw puff pastry sheets.  Pre-heat oven to 400 degrees.  Cut each sheet into 9 squares.  Place 1 TBSP or less of whipped peanut butter and chocolate in the center of each square.  Fold and seal by pressing and using a fork.  Place on cookie sheet lined with parchment paper or silpat.  Bake for 10-15 minutes until lightly browned.  Makes 18 pies.  176 calories each.
Mary- you had me at peanut butter AND chocolate!  The best combination ever invented.  These remind me of the chocolate turnovers that I love to get from Arby's.  Now, I can get my chocolate and peanut butter fix at home.  Thanks! -Karen

Sunday, October 19, 2014

Brain Break: "Dots"

This is a fun little brain break to do with your students, and it's a quiet one too.  "Dots" requires students to follow directions and use teamwork to accomplish a task.  


Dots
1.  Have students stand in a circle with their backs facing inside the circle. This is so they won't be able to see what color dot you are placing on other student's foreheads.

2.  Have students close their eyes.  You don't want them to see what color dot they have on their forehead either!

3.  Place a colored dot on their forehead.  You can get these at an office supply store, or in the office supply section of most discount stores.  I usually use 5 different colors.

4.  Tell students that the object of the "Dots" game is to find the other students who have the same dot on their forehead. They have to group up in a corner of the room. Here's the catch- they can't talk!  They have to find the other people with the same colored dots without talking.  They can use hand signals, but absolutely no noises!  The other challenge is they won't know what color their dot is either.

5.  Instruct students to open their eyes and begin moving around the room to find their friends with same color dots.

6.  In order to complete the challenge successfully, they must be in a group and have all the same colored dots.

When you do this activity, you'll see students try some unique strategies. Some student leaders will definitely emerge in the group. 

I'll never forget when one of my quiet students watched his friends try to get people in a group and their hands were flailing, trying to communicate without talking.  He just slowly walked to the corner and waited for the rest of the group to join him!  Really, a genius move on his part! 

You can add an extra challenge by adding a time limit.  

Check out some of my other brain breaks in previous posts at The Teacher Dish!

-Karen

The Book Challenge Update!

The Book Challenge in my 5th grade reading classes is well under way.  My students are reading the Sequoyah Children's Book Award nominees like crazy! I was thrilled to get a Donor's Choose grant so that I could purchase multiple copies of each book on this year's nominee list.  I can't keep the books in my classroom! Once one book is checked in, it is immediately checked out.  What a great problem to have!  


As of now, quite a few students have met the first incentive which was to read at least three of the nominated books.  There are several who have read up to the next incentive level, which is seven books.  I have one very motivated student who has read all 15 books!  After conferencing with students, there are some clear favorites.  I'll wait to tell you their favorites when we vote for our 5th grade favorites later in February.

If you want to know more information about The Book Challenge, here are the links to my first two posts about this fun project:

The Book Challenge!  (Get the complete list of books here!)

The Book Challenge- The Snowball Effect! (Find out about the incentives here!)

Students have been writing responses after they read each title.  They can write about their favorite part, their favorite character, the setting, the problem and solution, or write a plot summary.  They can also write a book recommendation to a friend. 

After I started getting a slew of these in, I wondered what I should do with them. My teacher friend suggested we put them into a binder.  I created a binder and tabs with each book title.  When students turn in their responses, I put a three-hole punch in them and slip them into the binder.  Students love reading what others are writing about the books.


Here are some examples of their reading responses:


This type of binder would be great for any class library.  You could make a binder full of book recommendations, or even create a bulletin board.  So far, the kids love reading what other kids are saying about these books.

This has turned into a fun project for my students and it has encouraged them to read a variety of books.  I'll keep you posted!

-Karen
Tuesday, October 14, 2014

Esperanza Rising- A Great Character Study

In the district where I teach 5th grade reading, we use the Lucy Calkins Reading Workshop approach.  The Reading Workshop has several units that focus on different teaching points.  For the "Following Characters Into Meaning", I have chosen to read Esperanza Rising by Pam Munoz Ryan and relate it to my Reading Workshop mini-lessons.  This specific reading unit, "Following Characters Into Meaning", focuses on understanding character's thoughts, motivations, feelings and how they all relate to the story and other characters.  

The novel, Esperanza Rising, is a great fit for this particular unit and my 5th grade students because it has great characters, it has a Fountas & Pinnell reading level of V, and it is written at a 5th grade interest level. In my 5th grade classes, it is accessible to the majority of students for reading independently and for searching for text evidence for written responses.  

To make the novel manageable for mini-lessons, I have broken up the chapters into two or three parts and read one part each day.  This allows time for the mini-lesson, discussion, reading responses, and time for students to do their independent reading.


An anchor chart suggested by the Lucy Calkins Reading Workshop
book "Following Characters Into Meaning"
The story line covers some thought-provoking issues such as The Great Depression, poverty, class differences, immigration issues, migrant workers, strikes, and racism.  At this age, students may have not heard some of these vocabulary words, but they are old enough to grasp the meaning and are able to have a discussion of what they think and how it pertains to the story and characters.  We've had some great discussions about how these issues have affected the characters in the story.

The novel also lends itself to naturally teaching about character traits, symbolism, theme, and figurative language- which are some of the reading skills that are introduced to our 5th grade students.

Character Maps
While reading Esperanza Rising, students created character maps in their Reading Notebooks.  Below are some examples.


Character maps for Esperanza, Mama, and Papa.
Character maps for Hortensia, Alfonso, Miguel, and Abuelita.


In addition to students keeping a character map in their Reading Notebook, I create character maps on large chart paper and hang them up around the room for easy reference.  I usually begin with the simple question, "What do we know about this character?"  After each chapter, we can add new characters that are introduced, or add more things that we find out about a character.

Character Traits
As we studied the character's in Esperanza Rising, some of the mini-lessons focused on character traits.  Students made lists of character traits in their Reader's Notebook.  They practiced identifying precise words to describe a character.  Students used sticky notes to jot down information about character's that were featured in their own independent reading texts.  An important piece of this assignment was providing evidence to support the character trait.  I asked students, "Why is the character like that?, How do you know?  What evidence from the text can support your character trait?"  I told students they need to prove it!


An anchor chart that reminded students what to put on their sticky note.
The circle with an M is for my last name.  I have four sections of students,
so I have students put their homeroom teacher's initials in a circle by their name.
Reading Summaries
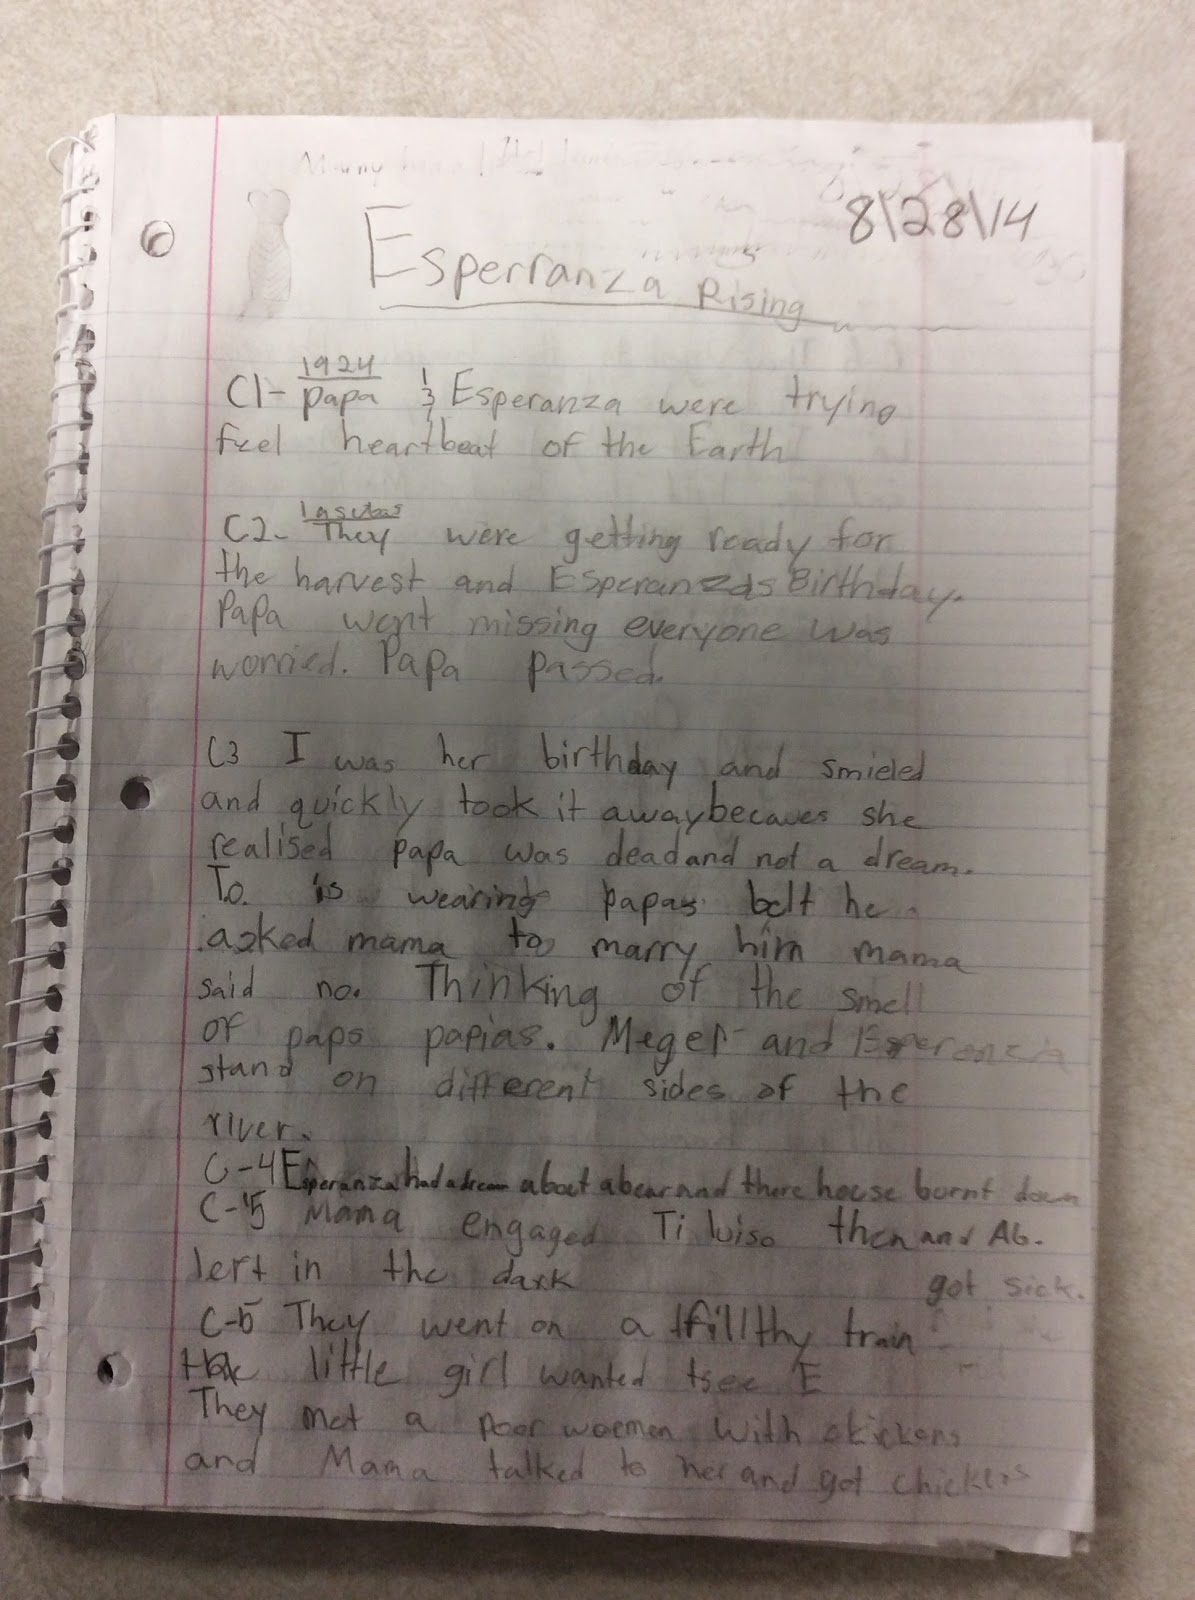
Students wrote short reading summaries in their Reading Notebook after we read each chapter.  This was mainly so they could keep track of what characters are doing, how they are changing, and the main events of each chapter.  It's almost like a vertical time-line of events.  I started off by modeling how to write it.  We first brainstormed and identified the important events of the chapter, or the section that I read that day.  Then, I modeled how to write it using chart paper.  I did this just a few times, then gradually released them to do it independently.  After we read, we would always discuss the important parts of what was read and discuss ideas for what students could write in their quick summaries. We also took time for students to share their summaries with partners or with the class.  Below are a few examples of student summaries.  


Examples of reading summaries from Esperanza Rising.
Symbolism
Each chapter in Esperanza Rising has the title of a fruit or vegetable.  The tiles of the chapters symbolize something important in Esperanza's (the main character's) life.  Below is a chart that students used to keep track of the symbolism behind each chapter.


Reading Responses
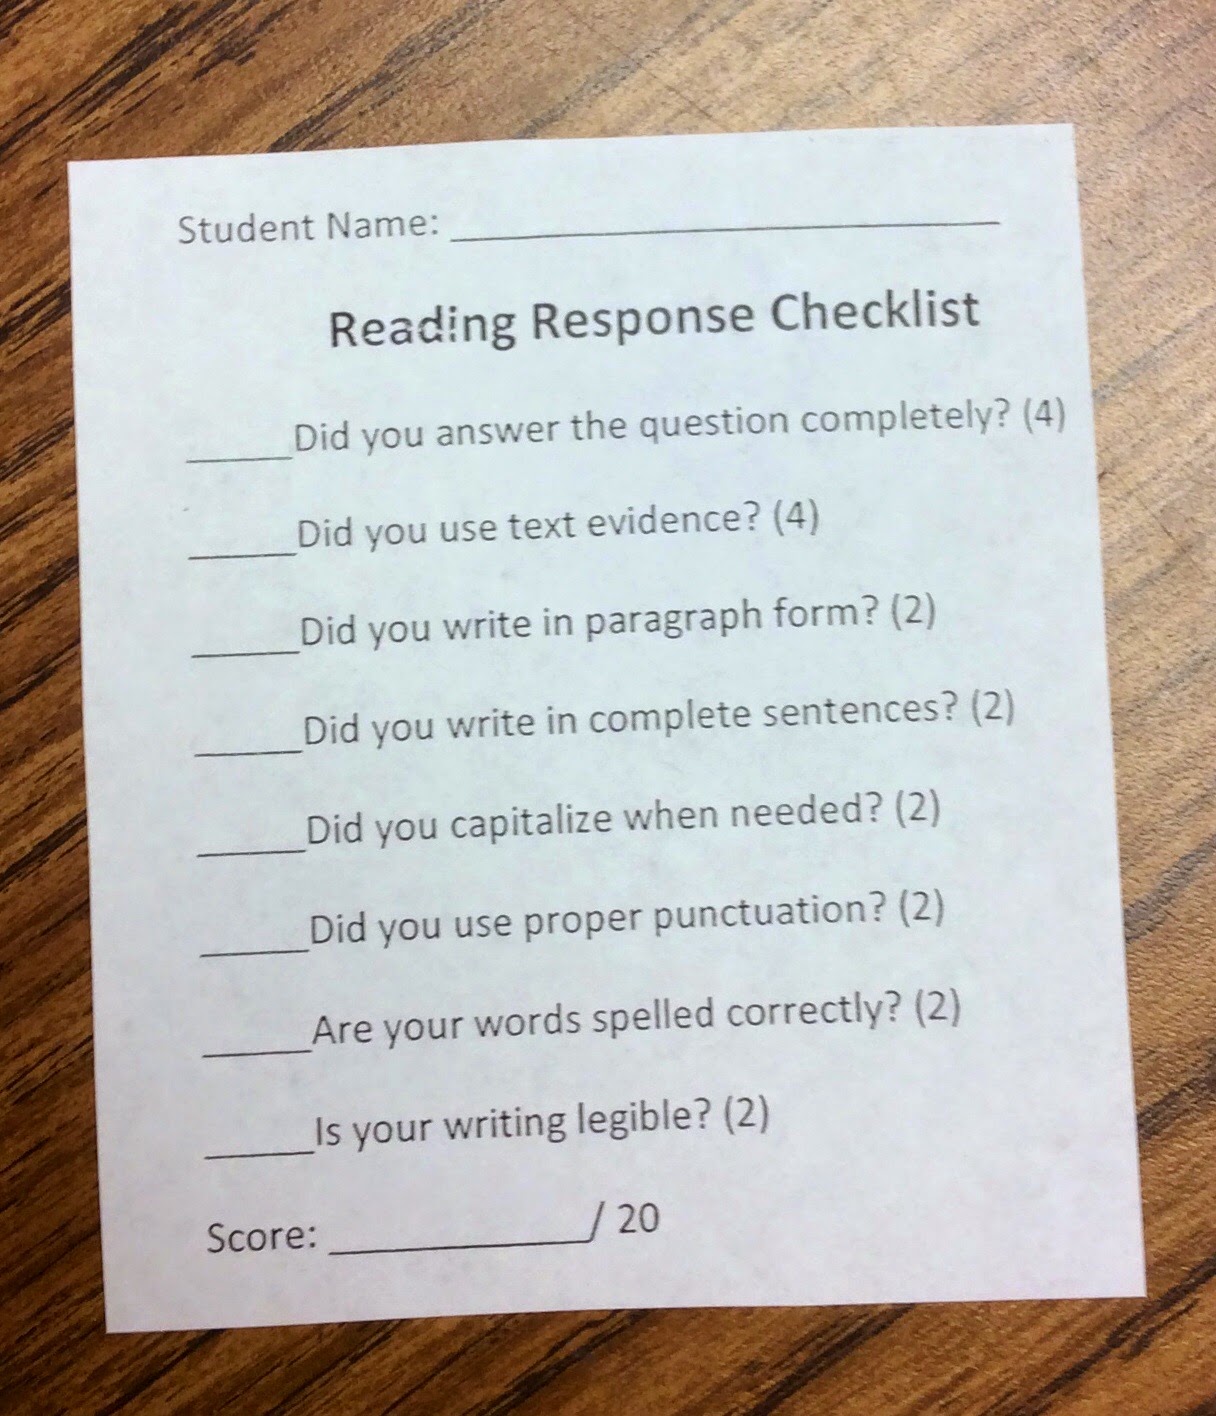
Students wrote reading responses that correlated with open-ended questions about each chapter.  I used a Reading Response Checklist so students would remember to write in proper paragraph form.  Below are examples of the checklist and some student responses that show their thinking about their reading.


We aren't quite finished with the book yet, but I have a few more things planned for students.  After we complete the book, students will complete a comprehension test with multiple choice and essay questions.  I've also thought about having them re-write the ending.  This idea came to me as students were discussing the book and making predictions about what they thought was going to happen, or what they would like to happen.  Writing their own ending might give them a chance to explore some of these unique ideas.

Esperanza Rising is a favorite chapter book of mine, but there are so many other books with great story lines and characters that I could use for this reading unit.  I'm already thinking about what I may read to students next year.  I love classic literature, but there's also so much great NEW literature that's emerging on the scene.  So...I'm thinking.  I'll let you know what I come up with!

Happy Reading!
-Karen

Monday, October 13, 2014

Brain Break: "Who is it?"

Here's a quick brain break you can do with your students.  Brain breaks are really fun to do after students have been sitting for awhile, or in between subjects.  It helps get their wiggles out.  This brain break is called "Who is it?" and my students absolutely love it.


"Who Is It?"
  1. Have students stand in a circle.
  2. Choose one person to sit in the center with their head down and eyes covered with their hands, or you can use a blindfold to cover their eyes.
  3. Tell the students in the circle that you (the teacher) are going to point to one person in the circle to say "hello", or say something else in a disguised voice to the person sitting in the middle of the circle.  
  4. Have the students begin walking silently around the person sitting in the center.  
  5.  Point to one person and give them the signal to say something in a disguised voice.
  6. The person you choose will say "hello" or something else in a disguised voice.  
  7. Tell the student in the center that they will get one guess as to who they think the person is that spoke to them.  If their guess is correct, then they can join the others in the outside circle.  If their guess in incorrect, then point to another person to say "hello" or something else in a disguised voice.  You can do this two or three more times until you switch to another student.
Your students will surprise you with their disguised voices!  I'll never forget when the most petite little girl in my class came out with this deep, man-like "Hello".  It was so funny. The person NEVER guessed it was her.  I wouldn't have either.  

Here are some links to some other brain breaks you can try with your students.  Just click on the link and you'll see the post with directions for the brain break.


Have fun with your brain breaks!

-Karen

Sunday, October 12, 2014

Tuscan Chicken Soup

Fall weather just screams for a nice, hot bowl of soup.  Here's an easy soup to prepare using rotisserie chicken and some other really healthful ingredients.


Tuscan Chicken Soup
1 cup chopped baby carrots
1/2 medium onion, chopped
1 teaspoon minced garlic
1 can Cannellini beans (white kidney beans), 15.5 ounces
2 cups shredded chicken (I use rotisserie chicken)
3 cups chicken broth
1 tablespoon Italian seasoning
2 cups baby spinach leaves


Directions:
  1. Saute carrots, onions, and garlic in 1 tablespoon extra virgin olive oil in a soup pot.  
  2. Add 1 can Cannellini beans (white kidney beans), rinsed and drained.
  3. Add 2 cups shredded chicken.  (I use rotisserie chicken)
  4. Add 3 cups chicken broth.
  5. Add 2 cups baby spinach.
  6. Add in 1 tablespoon of Italian Seasoning.  Add more if needed to suit your taste.
  7. Let simmer on stove for about 30 to 40 minutes.

Here's a link to one of my other favorite soups:


Enjoy "Soup Season"!

-Karen


PS- This soup tastes even better as leftovers the next day!  

Chicken Tamale Pie

I have loved tamales since I was a little kid.  For some reason, I always called them "Mollies".  This would always make my family laugh.  My mom didn't make homemade ones, but I loved eating the ones straight from a can.  Let's just say that seven year olds don't have a discriminating taste and leave it at that.  I still love them, but who has time to make fresh homemade tamales for dinner?  And, as an adult, I want something more than a canned tamale for dinner. So, here is a tasty version of a tamale and it's gluten-free too.  It's easy to make and delicious.


The recipe first came to my attention years ago in Cooking Light magazine (I'll include the link).  I tried it and loved it.  Since then, I've adapted the recipe a little and made it gluten-free for my husband.  It's really yummy and even though it doesn't look like a traditional tamale- it sure tastes like one.  Here's the one from Cooking Light:

Chicken Tamale Casserole from Cooking Light

Chicken Tamale Pie
For the Cornbread:
1 package gluten-free cornbread mix (I use Bob's Red Mill.  If you aren't concerned about gluten, I love using Jiffy Corn Bread Mix.)
1 small 4-ounce can of mild green chilies, rinsed and drained - omit if you don't like spicy!
1/4 cup shredded cheese
1 can creamed corn (14.8 ounces)
2 eggs (you can use egg substitute)
1/2 cup skim milk

* The gluten-free cornbread mixture will thicker than non-gf cornbread.


For the Topping (use below amounts if you are making a casserole dish or two pie plates, 1/2 it if you plan to make one pie plate and 9 muffins like I did):
2 cups shredded chicken (I cheat and use Rotisserie chicken- I'll use the rest of the chicken for another recipe tomorrow)
2 cans or 2 packages of gluten-free Red Enchilada Sauce
1 cup shredded Mexican Blend Cheese
1/2 package taco seasoning mix
1 cup chicken broth
3/4 cup shredded cheddar cheese

Makes about 12 servings.  1 pie plate is about 6 servings.


Garnish Options: sour cream, salsa, diced tomatoes, cilantro, avocado.

Before you begin:  Decide how much casserole you'd like to make.  You can make it in a casserole dish or use two pie plates for larger crowds.  Rectangle or round- the choice is yours!  If you want to make a smaller amount, use half of the cornbread mix for the tamale pie and the other half to make cornbread muffins for another meal.  You'll also reduce the amount of shredded chicken to 1 cup, use half the amount of red enchilada sauce, 1/4 a package of taco seasoning, 1/2 cup chicken broth, and about 1/2 cup shredded cheese.  You can freeze the muffins for later or use them for you next meal.  That's what I did tonight.  I made one pie plate and 9 muffins.  

Directions:
  1. Preheat oven to 375 degrees.
  2. Combine the cornbread mix, green chilies, 1/4 cup shredded cheese, creamed corn, eggs, and milk. 
  3. Spray a casserole dish OR two pie plates with cooking spray. OR make one pie plate and put the rest in muffin tins.  Pour mixture into your dish.  Bake cornbread for 25 minutes or until nicely browned.
  4. While cornbread is baking, put your shredded chicken in a skillet and top with taco seasoning mix and 1 cup chicken stock.  Let simmer.

5.   After removing cornbread from oven, pierce cornbread with a fork and pour red enchilada sauce over cornbread.
6.   Top with shredded chicken mixture and shredded cheese.
Pierce cornbread liberally before pouring on the red enchilada sauce.
Add the chicken, the top with cheese.
8.    Bake uncovered in 375 degree oven for about 10-15 minutes, or until cheese is melted.
9.    Remove from oven and let sit for about 10 minutes.  
10.  Slice and serve with garnishes of your choice.

Tomorrow, I'm using the leftover rotisserie chicken in a Tuscan Bean Soup and we'll have the cornbread muffins with our soup.  Check back with The Teacher Dish for the recipe.

-Karen